To install a suction pool cleaner, start by turning off your pump and filter system to make certain safety. Attach the hose securely to the cleaner, making sure all connections are tight and free of leaks. Connect the hose to your skimmer or dedicated vacuum line, then fill the hose with water to eliminate air pockets. Submerge the cleaner and hose in your pool, then turn the pump back on. Adjust and secure the hose for effective cleaning—if you keep going, you’ll learn all the detailed steps.
Key Takeaways
- Turn off the pool pump and filter system to ensure safety before installation.
- Attach the hose securely to the pool cleaner, ensuring proper fit and no leaks.
- Connect the hose to the skimmer or dedicated vacuum line, adjusting length to prevent tangles.
- Prime the system by filling the hose with water and submerging the cleaner completely.
- Turn on the pump and verify the cleaner moves smoothly, adjusting hose placement if needed.
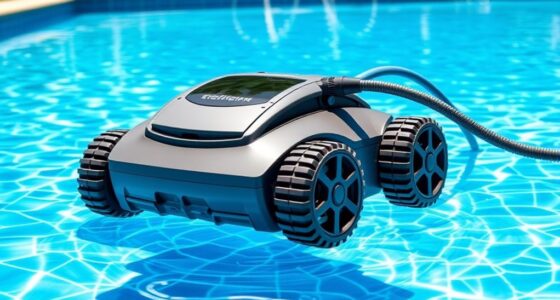
Gather Necessary Tools and Equipment
Before you begin installing your suction pool cleaner, it’s vital to gather all the necessary tools and equipment. First, identify the type of pool cleaner you have, such as a basic suction-side model or a more advanced version. Knowing your pool cleaner types helps determine the specific parts you’ll need. Next, consider hose material options; flexible vinyl hoses are common, but some models may use reinforced or lightweight options for easier handling. Make sure you have the correct hoses, a telescoping pole if required, and any adapters or fittings specified by the manufacturer. Having everything on hand guarantees a smooth installation process. Double-check your pool’s specifications and your cleaner’s instructions to avoid missing any essential components. Proper preparation saves time and prevents interruptions later. Additionally, understanding suction pool cleaner features and compatibility can ensure optimal performance once installed. It is also beneficial to review the installation instructions provided by the manufacturer to familiarize yourself with the specific steps involved. Knowing the proper setup procedures can further streamline the installation and optimize cleaning efficiency. Furthermore, confirming the presence of any additional accessories recommended by the manufacturer can help ensure comprehensive cleaning coverage.
Turn Off the Pool Pump and Filter System
Before installing the pool cleaner, you need to turn off the pump and filter system to avoid electrical hazards. Doing this helps prevent water damage to your equipment and keeps you safe during installation. Always confirm the system is fully powered down before proceeding. Additionally, ensure that the effectiveness of the system has been verified to avoid any operational issues later on. Checking the system status regularly can help maintain safe operation and prevent unexpected malfunctions. Incorporating system performance monitoring can further ensure that your equipment functions optimally after setup. Regularly reviewing the maintenance schedule can help identify potential issues early and sustain optimal performance. Maintaining awareness of latest safety guidelines can also contribute to a safer installation process.
Power Down Equipment
Turning off the pool pump and filter system is a crucial step before installing your suction pool cleaner. This prevents debris from circulating and ensures safety during setup. Before shutting down, check your pool’s chemistry to maintain proper chemical levels, which helps keep your equipment in good shape. Once the system is off, unplug the pump and filter to avoid accidental activation. Confirm that the water flow has completely stopped to prevent damage to the cleaner or equipment. Properly powering down also reduces the risk of water leaks or electrical hazards. Remember, routine equipment maintenance includes turning off your system before any installation or cleaning tasks. Additionally, consulting professional advice can help ensure the correct shutdown procedure for your specific equipment. Ensuring all safety protocols are followed, such as electrical safety, is essential to prevent accidents during installation. Being aware of power source safety can further minimize risks associated with electrical components. Incorporating proper shutdown procedures can also extend the lifespan of your pool equipment.
Prevent Water Damage
To prevent water damage during installation, it’s essential to turn off your pool pump and filter system completely. This ensures no water flows through the hoses or into the cleaner while you’re working. Proper pool cleaner maintenance, like inspecting hoses for leaks or cracks, helps avoid unexpected leaks that could cause water damage. When storing hoses after use, follow hose storage tips such as draining excess water and coiling hoses loosely to prevent kinks. This minimizes the risk of hose ruptures or leaks once reconnected. Always double-check that the pump and filter are off before attaching or detaching hoses. Additionally, understanding proper maintenance and features of your equipment can help you appreciate the importance of quality and proper handling, which is essential for maintaining equipment and preventing issues. Taking these precautions helps protect your pool and surrounding area from water damage and keeps your equipment in good condition.
Ensure Safety Measures
Making sure your pool pump and filter system are turned off is a vital step before installing a suction pool cleaner. This prevents accidents and protects you from sudden water movement. Before proceeding, check the pool’s chemical balance; a properly balanced pool enhances pool safety and reduces corrosion risks. Turning off the pump also helps avoid debris being sucked into the system during installation. Never work with the system running, as moving parts can cause injury. Confirm that the pool’s electrical components are safe and secure. Once the system is off, you can confidently install the cleaner, knowing you’ve minimized safety hazards. Properly shutting down the system ensures a smoother installation process and maintains a safe environment for everyone.
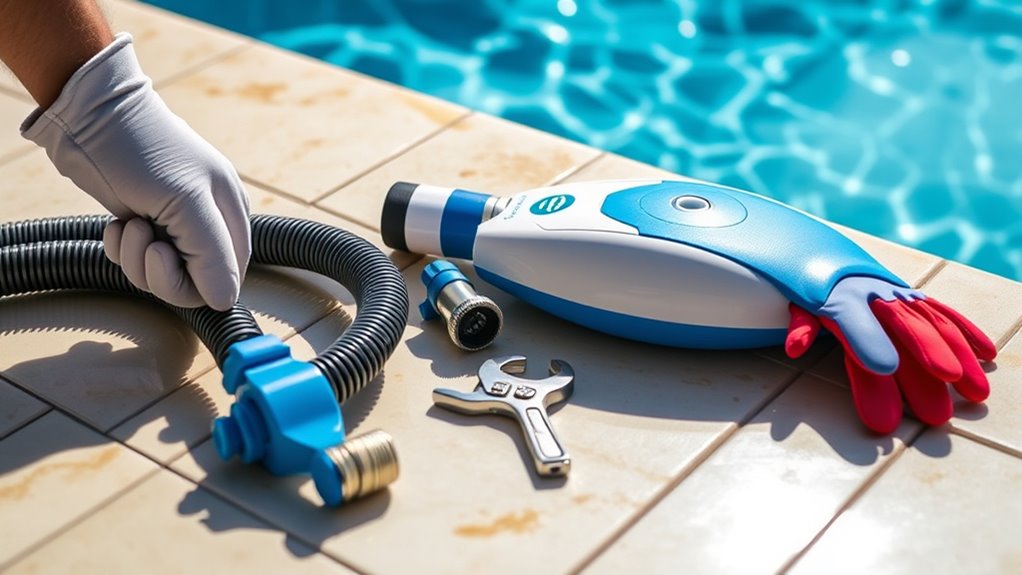
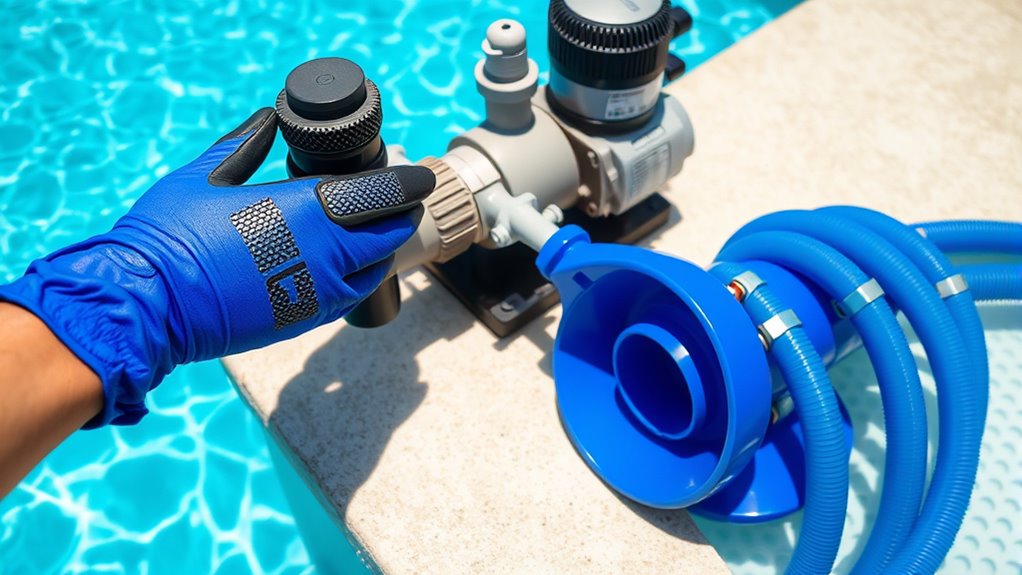
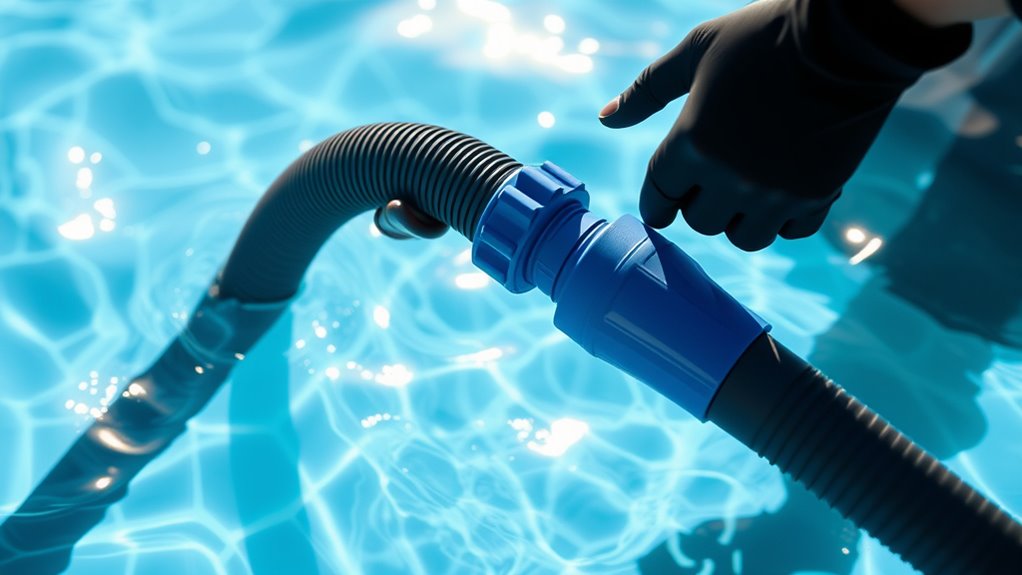
Attach the Hose to the Pool Cleaner

Make certain the hose is properly aligned with the pool cleaner to prevent leaks and guarantee smooth operation. Attach the hose securely using the correct connection technique, tightening it firmly but not excessively. Double-check that all connections are tight before turning the pump back on. Ensuring proper communication during setup helps avoid issues that could compromise the cleaning process.
Proper Hose Alignment
Proper hose alignment is essential for your pool cleaner to operate effectively. Begin by ensuring the hose length is appropriate for your pool size; an overly long or short hose can disrupt water flow. When attaching the hose, keep it straight and free of tangles, allowing water to circulate smoothly. Misaligned hoses can create resistance, reducing suction power and cleaning efficiency. Check that each section of the hose is securely connected without kinks or twists. Proper alignment ensures even water flow, which helps the cleaner move correctly across the pool surface. Take your time to straighten the hose as you attach it, avoiding bends that could obstruct water movement. Correct hose alignment maximizes cleaning performance and prolongs the life of your pool cleaner.
Secure Connection Technique
To securely attach the hose to your pool cleaner, start by lining up the hose end with the cleaner’s inlet port. Push firmly until you hear a click or feel it lock into place. A tight connection is essential for proper suction, which improves cleaning efficiency and prevents leaks. As part of regular equipment maintenance, check the connection regularly to ensure it remains secure. Proper hose attachment also helps maintain balanced pool chemistry by preventing debris buildup that could affect water quality. If the hose feels loose, reattach it firmly, and inspect for damage or cracks. Ensuring a proper connection technique is crucial for optimal performance and longevity of your pool cleaning equipment. Additionally, using advanced AI-powered tools can assist in diagnosing issues with your pool system and optimizing maintenance routines. Regularly inspecting and maintaining your pool components can also prevent leaks and blockages, ensuring smooth operation. Properly securing all connections and understanding system diagnostics can further enhance the efficiency of your pool cleaner. Consistent, secure connections optimize your pool cleaner’s performance, reducing strain on the pump and extending equipment lifespan. This simple step improves cleaning effectiveness and ensures effective cleaning and smooth operation.
Connect the Hose to the Skimmer or Dedicated Vacuum Line
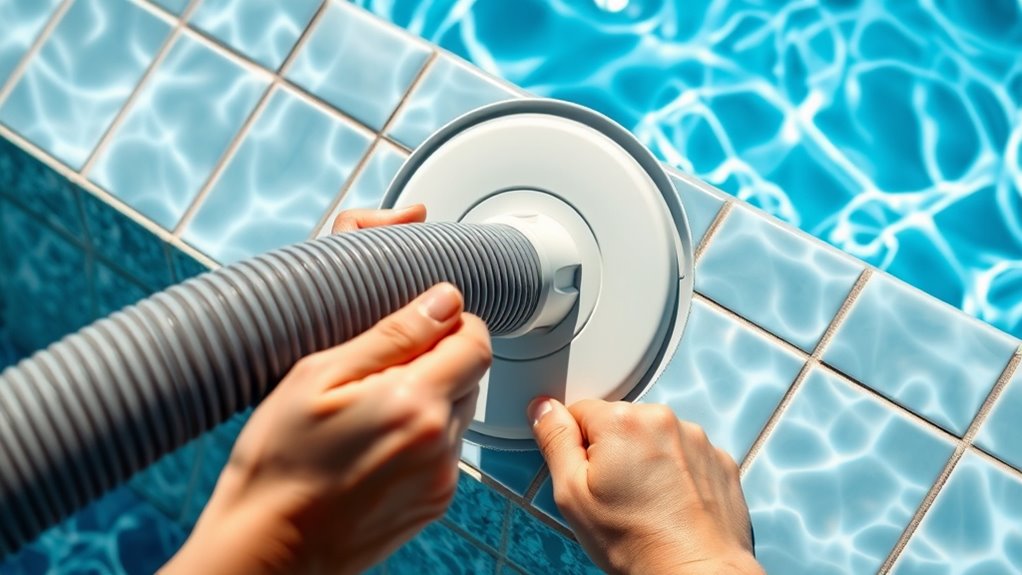
Connecting the hose to the skimmer or dedicated vacuum line is a straightforward step that guarantees your pool cleaner can effectively remove debris. Start by selecting the appropriate hose length—too long can tangle, too short might limit movement. Confirm the hose fits securely; most systems use different connector types, such as swivels or threaded fittings. Attach the connector to the skimmer or vacuum port firmly, making sure it’s snug to prevent leaks or disconnections during cleaning. If your hose has multiple sections, connect them tightly, avoiding kinks or twists. Double-check that all connections are secure before moving on. Properly connecting the hose ensures maximum suction and efficient debris removal, making your cleaning process smoother and more effective. Proper connection techniques are essential for optimal pool cleaning performance.
Prime the Pool Cleaner and Hose System

Before starting the cleaning process, you need to prime the pool cleaner and hose system to guarantee ideal suction. Begin by ensuring your pool’s chemical balance is proper, as this helps prevent debris buildup and maintains water clarity. Next, fill the hose with water to remove air pockets, which can disrupt suction. Connect the hose securely to the cleaner and the skimmer or dedicated line, then submerge the entire setup in the pool to ensure it’s completely filled. During seasonal maintenance, it’s especially important to verify that the system is prepared correctly for maximum efficiency. Proper priming ensures the cleaner functions smoothly, avoiding interruptions caused by airlocks. Once primed, you’re ready to move on to submerging the cleaner and hose in the pool.
Submerge the Cleaner and Hose in the Pool

Once the hose and cleaner are properly primed, fully submerge the entire setup in the pool. Make sure the pool water chemistry is balanced, as imbalanced pH or chlorine levels can affect the cleaner’s performance. Carefully lower the hose and cleaner into the water, ensuring no air bubbles are trapped, which could interfere with suction. As you submerge, verify that the suction power adjustment is set correctly for your pool size and debris load. Proper submersion guarantees the cleaner can move freely and maintain ideal suction. Keep an eye on the hose’s length and positioning to prevent tangling or kinks. Once submerged, you’re ready to proceed with turning the pump back on and confirming the cleaner’s movement.
Turn the Pump Back On and Check for Proper Movement

How can you guarantee your suction pool cleaner is working correctly after submersion? Once you turn the pump back on, observe its movement. Proper movement indicates good pool circulation and effective debris removal. Watch for the cleaner gliding smoothly over the pool floor and sides. If it’s stuck or not moving, check for obstructions or proper hose placement. Use this quick reference:
| Issue | Solution |
|---|---|
| Cleaner not moving | Clear hose kinks or obstructions |
| Limited coverage | Adjust hose length or position |
| Stuck on steps or corners | Redirect cleaner to open areas |
| Poor pool circulation | Check pump function and skimmer flow |
| Debris not being removed | Clean filter and skimmer baskets |
Ensure everything runs smoothly for ideal debris removal and circulation.
Adjust and Secure the Hose for Optimal Cleaning
To guarantee your suction pool cleaner works efficiently, you need to properly adjust and secure the hose. Start by setting the correct hose length—measure and cut or connect sections so it reaches all pool areas without excess slack. Too long and the hose may tangle or reduce suction; too short and it won’t cover the entire pool. Ensure the hose’s flexibility is maintained, so it moves smoothly along the pool surface. Secure the hose tightly to prevent leaks or disconnections during cleaning. Use hose weights or floats if necessary to keep it submerged and steady. Double-check that all connections are snug and the hose is free of twists. Properly adjusting and securing the hose maximizes cleaning efficiency and prevents interruptions.
Frequently Asked Questions
How Do I Troubleshoot if the Cleaner Isn’t Moving Properly?
If your suction pool cleaner isn’t moving properly, start by checking for pool debris that might clog the intake or hoses, causing suction issues. Make sure the hoses are securely connected and free of kinks or leaks. Also, verify that the skimmer and pump baskets are clean, as debris can reduce suction power. These simple steps help restore proper movement and ensure your cleaner functions effectively.
Can I Use a Suction Pool Cleaner in Saltwater Pools?
You might find yourself curious if your trusty suction pool cleaner can handle saltwater’s charm. The good news is, many models boast saltwater compatibility, making maintenance a breeze while keeping your cleaner in top shape. Just double-check your cleaner’s specifications, make sure proper cleaning after use, and you’ll enjoy sparkling results without worry. With the right care, your cleaner will work smoothly, even in the salty embrace of your pool.
How Often Should I Clean or Replace the Hoses?
You should clean your hoses regularly as part of your hose maintenance, ideally once a month or more if you notice debris buildup. Follow a consistent cleaning schedule to prevent clogs and guarantee peak performance. Replace hoses if they become cracked, brittle, or damaged, usually every 1-3 years depending on usage. Regular inspection and maintenance keep your suction pool cleaner working efficiently and extend its lifespan.
Is It Necessary to Remove the Cleaner After Each Use?
Did you know that neglecting proper maintenance can reduce your pool cleaner’s lifespan by up to 50%? It’s a good idea to remove the cleaner after each use to prevent debris buildup and potential damage. Follow basic maintenance tips and storage guidelines, like rinsing the cleaner and storing it in a cool, dry place. This simple habit keeps your cleaner in top shape, saving you money and hassle in the long run.
What Safety Precautions Should I Follow During Installation?
When installing your suction pool cleaner, you should prioritize pool safety and electrical precautions. Make sure the pool power is off before starting, and avoid installing near electrical outlets or wiring. Use a GFCI outlet to prevent shocks, and keep the area dry. Carefully follow the manufacturer’s instructions to guarantee safe attachment. Taking these steps helps prevent accidents and ensures your cleaner works effectively.
Conclusion
Now that you’ve installed your suction pool cleaner, you’re ready to enjoy crystal-clear water with minimal effort. Remember, a properly connected cleaner works like a loyal companion, tirelessly tending to your pool’s needs. Keep an eye on its movement and adjust the hose as needed, ensuring it functions smoothly—because in the dance of maintenance, precision leads to perfection. With this simple setup, your pool will always be a invigorating oasis.