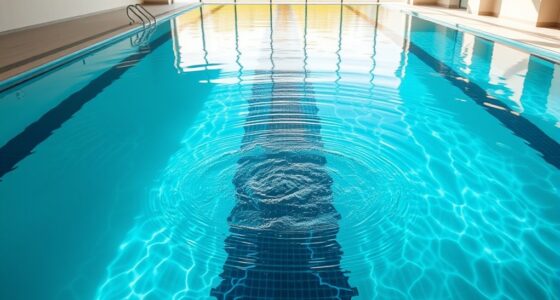
To effectively reveal hidden issues underwater, use a variety of angles, including top-down, side, and close-up shots. Adjust your lighting to reduce shadows and backscatter, and stabilize your camera with gimbals or steady breathing. Combining wide views with detailed close-ups helps identify cracks, corrosion, or structural wear early. Proper angles and techniques uncover problems others may overlook, ensuring thorough inspections—keep going to discover even more strategies for clear, revealing footage.
Key Takeaways
- Utilize top-down and side angles to capture comprehensive views of structures and identify hidden damages.
- Incorporate close-up shots to detect microcracks, corrosion, or growths early before they worsen.
- Adjust lighting angles and diffuse illumination to reduce shadows, backscatter, and enhance visibility in murky waters.
- Maintain steady camera movement with stabilizers and buoyancy control for clear, vibration-free footage.
- Combine multiple perspectives during filming and editing to create a complete visual understanding of problem areas.
Why Camera Angles Matter in Underwater Inspections

The angle at which you position your camera can considerably impact the quality and usefulness of an underwater inspection. Choosing the right angle helps you capture clear views of underwater wildlife and important structural details, making it easier to identify issues. It also aids in marine navigation, allowing you to better understand the environment and avoid obstacles. A straight-on shot might miss hidden damages or obscure key features, while a slight tilt can reveal cracks or corrosion that would otherwise go unnoticed. Proper camera angles provide a thorough perspective, ensuring you don’t overlook critical signs of wear or damage. Additionally, understanding European cloud innovation can support remote monitoring and data analysis, enhancing inspection accuracy. Moreover, adjusting your angle to account for net worth and personal branding can help in documenting and presenting findings more effectively. When considering the contrast ratio of your camera, selecting an angle that maximizes contrast can significantly improve the visibility of subtle details in dark or murky waters. Incorporating advanced imaging techniques and real-time data processing can further enhance the clarity and detail captured during inspections. Ultimately, adjusting your angle thoughtfully improves the accuracy of your inspection and helps you gather more valuable insights.
Basic Underwater Filming Techniques for Troubleshooting

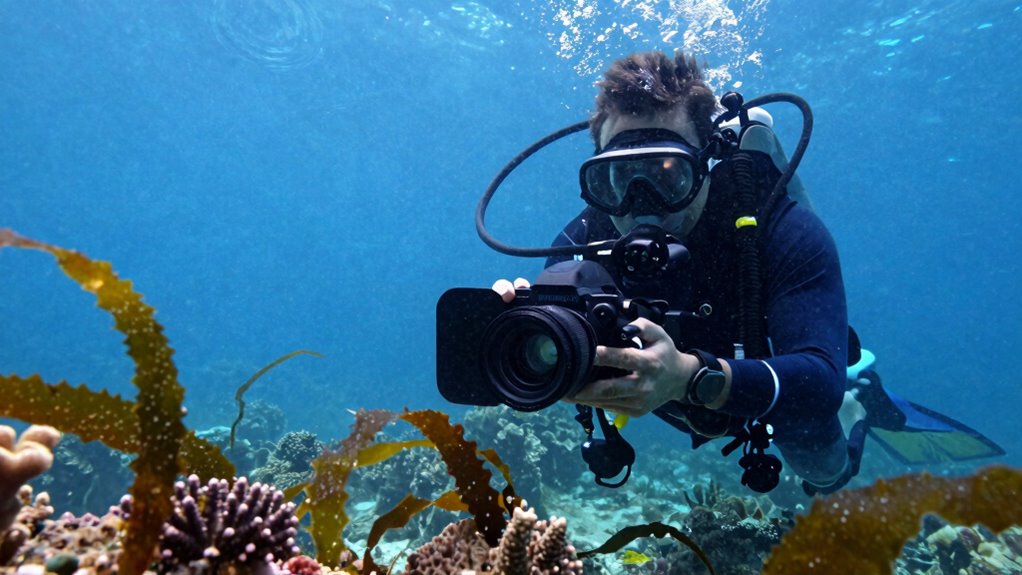
Mastering basic underwater filming techniques is key to effective troubleshooting during inspections. Clear footage allows you to identify issues quickly and accurately. Use steady camera movements to maintain focus on problem areas, avoiding unnecessary shaking. Good underwater communication with your team helps coordinate views and angles, ensuring extensive coverage. Adjust your lighting to minimize shadows and enhance visibility of corrosion or damage. When observing marine wildlife, keep a respectful distance to prevent disturbance while capturing natural behavior, which can sometimes reveal subtle signs of structural stress. Always check your camera settings before starting, ensuring sharp focus and proper exposure. These foundational techniques help you gather reliable images, making it easier to diagnose problems and plan repairs efficiently.
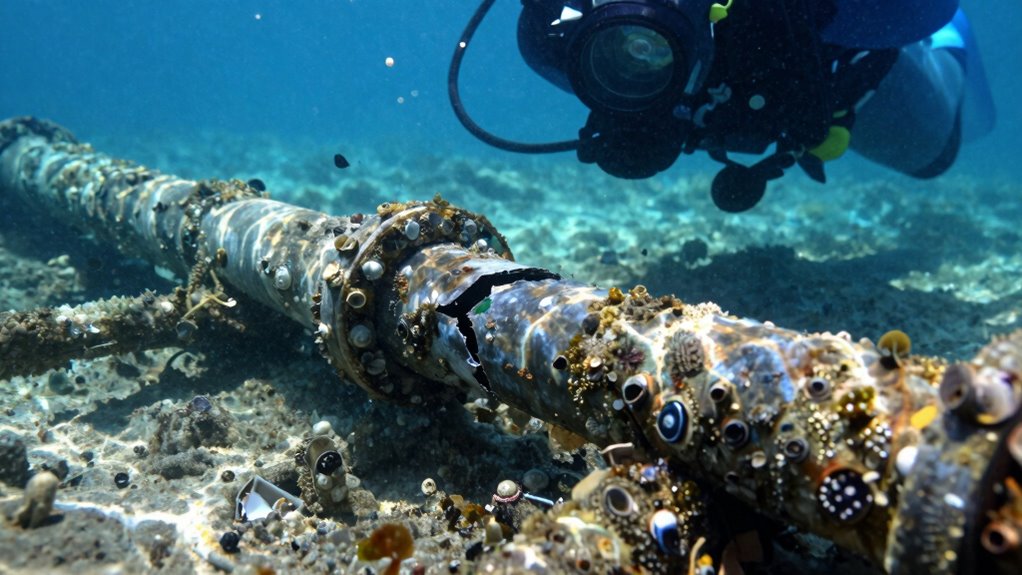
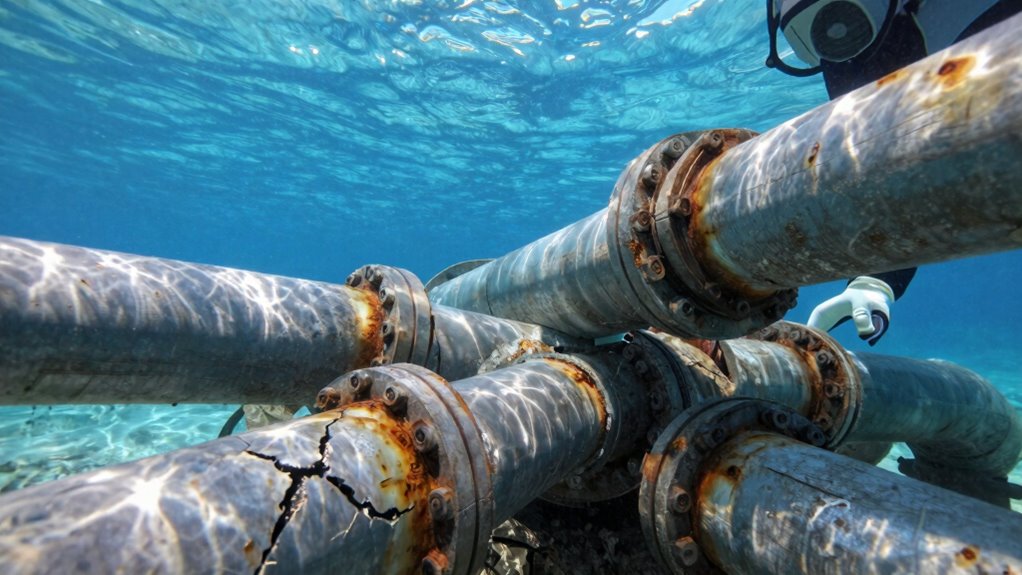
Use Close-Ups to Detect Microcracks and Corrosion
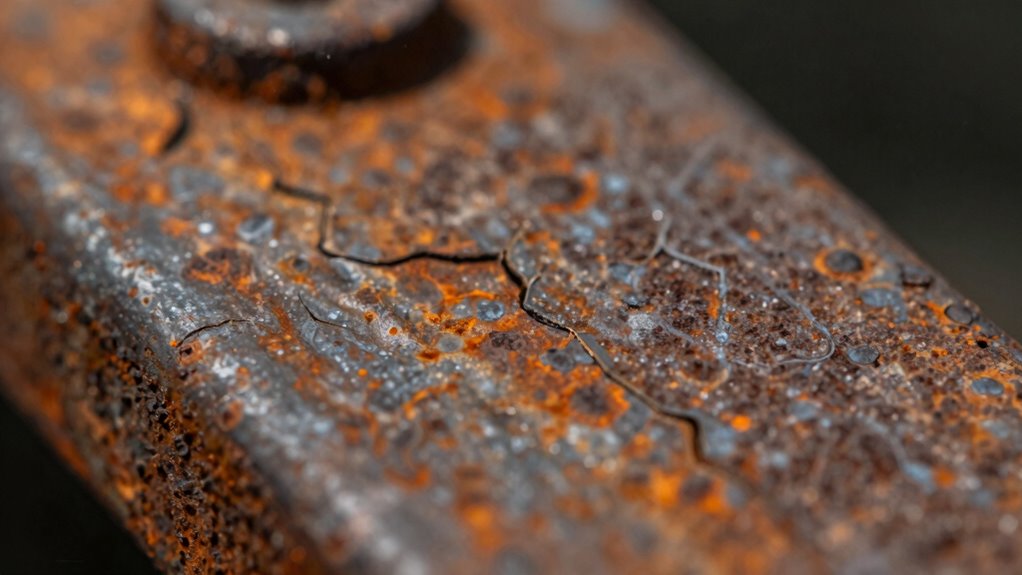
Close-up shots are essential for revealing microcracks and corrosion that often go unnoticed with wider angles. These detailed views allow you to detect microcrack detection early, preventing potential failures. When filming close-up, focus sharply on the surface to spot tiny fractures or signs of corrosion, such as discoloration or pitting. Microcracks can develop beneath the surface and weaken the structure over time, so catching them early is vital. Similarly, corrosion spotting becomes easier with close-ups, as you can identify rust or mineral buildup at a glance. Using proper lighting enhances visibility, highlighting subtle damage that might otherwise be missed. Incorporating close-up techniques into your underwater inspections to guarantee no small flaw goes undetected, maintaining the integrity of the structure and preventing costly repairs. Paying attention to surface detail is crucial for damage assessment, and ensuring structural safety. Additionally, understanding how wave and wind impact underwater structures can help predict areas prone to damage and tailor your inspection strategies accordingly. Recognizing early warning signs through detailed imagery can significantly improve maintenance planning and longevity of underwater assets. Being aware of microstructural changes can further help you anticipate potential failures before they become critical, especially when considering the effects of support Breakfast practices on structural assessments.
How Wide-Angle Shots Help Assess Structural Damage

While close-up shots reveal detailed damage like microcracks and corrosion, wide-angle footage provides the broader context needed to assess the overall condition of a structure. By capturing extensive views, you can identify patterns of deterioration, deformation, or displacement that might not be visible up close. This perspective is essential for understanding how structural damage affects the surrounding environment, including marine biology and underwater ecosystems. Wide-angle shots help you see the relationship between the structure and its habitat, revealing areas where debris or damage might threaten marine life. They also facilitate comparisons over time, making it easier to track progression. Additionally, visual documentation with wide-angle shots supports accurate reporting and decision-making for maintenance or conservation efforts. Recognizing the importance of environmental impact assessments ensures that structural evaluations consider the broader ecological consequences. Incorporating long-term monitoring through wide-angle imagery can greatly enhance the ability to detect subtle changes and plan appropriate interventions. Moreover, employing advanced imaging techniques can improve the clarity and detail of these wide-angle captures. Understanding the structural integrity of underwater constructions is crucial for preventing catastrophic failures and safeguarding marine habitats. Overall, these shots give you a holistic understanding of the structure’s health, guiding effective maintenance and conservation efforts.
Best Lighting Angles for Murky or Shadowed Areas
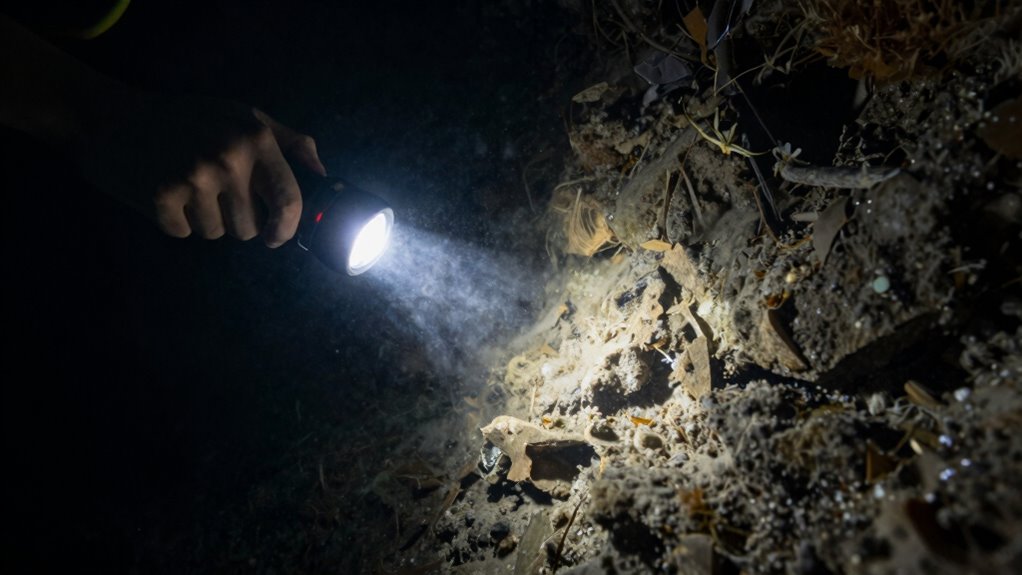
When filming in murky or shadowed underwater areas, choosing the right lighting angles can dramatically improve image clarity. Proper underwater lighting helps illuminate shadowed angles that naturally hide details, making your footage clearer and more detailed. Position your light source at a slight angle rather than directly in front or behind your subject. This technique minimizes backscatter and enhances contrast, especially in low-visibility conditions. Shadowed angles can be tricky, but angling your light to sidestep particles and uneven surfaces reveals hidden features. Using diffuse or wide-beam underwater lighting spreads illumination smoothly across shadowed areas, preventing harsh shadows or overexposure. Adjusting your angles thoughtfully ensures you capture sharp, vibrant footage, even when visibility is less than ideal. Incorporating simple tools like BTU and CADR quick‑calculators can also help optimize your lighting setup for different underwater conditions.
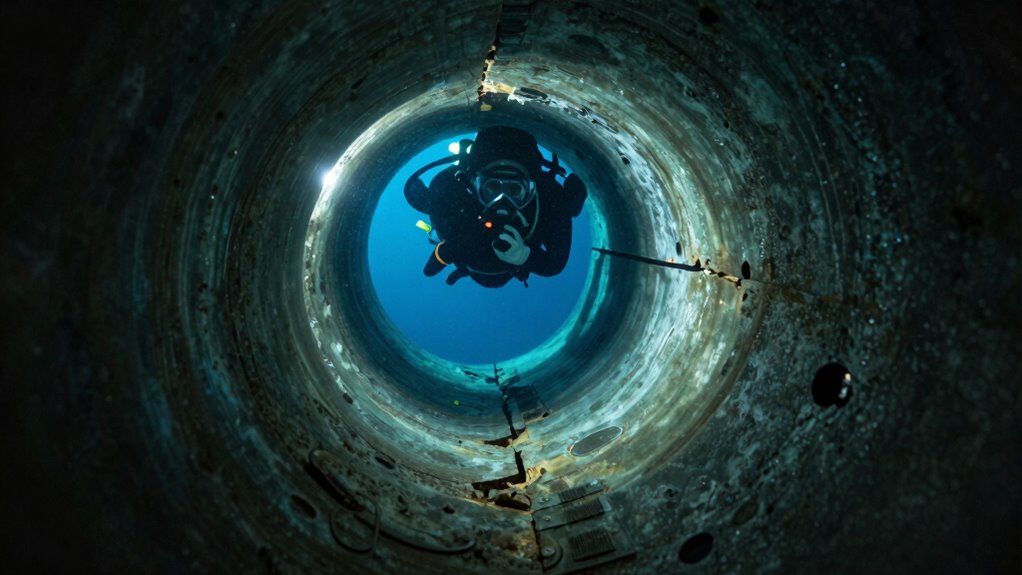
Top-Down and Side Angles for Better Context

Top-down and side angles are essential for providing context and depth in your underwater footage. Using a top-down view helps you capture the relationship between marine life and the surrounding underwater flora, revealing how species interact with their environment. It also showcases the layout of coral reefs or seaweed beds, giving viewers a clearer sense of scale. Side angles add dimension, allowing you to highlight the movement of fish or the textures of underwater plants. These perspectives help tell a complete story, making it easier to identify the real problem behind any issues you observe. Combining top-down and side shots ensures your footage offers thorough insight into the underwater ecosystem, making your videos more engaging and informative.
Stabilizing Your Camera in Unsteady Water Conditions
When water is unsteady, stabilizing your camera becomes essential for clear footage. You can improve stability by using appropriate equipment, controlling your buoyancy, and keeping your breathing steady. These techniques help you maintain smooth shots despite challenging conditions. Incorporating connected fitness technology such as stabilizing mounts or gimbals can further enhance your camera stability underwater. Additionally, understanding aerial imaging principles can help you anticipate water movement and adjust your technique accordingly. Recognizing hydrodynamic effects can assist you in predicting how water currents will influence your shot, allowing for better preparation and adjustment. Being aware of fluid dynamics can also aid in understanding how water flow impacts your camera’s positioning and stability, especially when considering water flow patterns that affect your shot consistency.
Use Stabilizing Equipment
Stabilizing your camera is essential when filming in unsteady water conditions, as even slight movements can blur your footage. To achieve this, use stabilizing equipment like gimbals or steadicams designed for underwater use. These camera accessories help counteract motion, keeping your shots steady and clear. Make sure your camera is secured with reliable underwater housings that provide stability alongside protection. Attach stabilizers firmly and test them before diving to ensure they function correctly. Lightweight options reduce fatigue, allowing you to focus on capturing smooth footage. Remember, the right stabilizing equipment minimizes vibrations and sudden shifts, helping you record professional-quality shots even in turbulent waters. Your careful setup makes all the difference in revealing the underwater scene’s true essence. Incorporating design principles can further enhance your setup by ensuring optimal balance and functionality. Additionally, considering ergonomic considerations can help prevent fatigue during extended filming sessions. Properly balanced gear and ergonomic design also contribute to more comfortable handling, especially during lengthy shoots.
Employ Proper Buoyancy Control
Maintaining proper buoyancy is essential for stabilizing your camera in unsteady water conditions. Start with buoyancy tips like adjusting your gear to achieve neutral buoyancy, so you stay steady without constant effort. Equipment calibration plays a crucial role—regularly check and fine-tune your weights and buoyancy devices to match your body and gear. Proper calibration prevents unwanted sinking or rising, giving you better control. Focus on staying relaxed and mindful of your position, allowing your movements to be smooth and deliberate. Practice buoyancy control in controlled environments before diving into complex shots. With proper buoyancy tips and calibrated equipment, you’ll keep your camera steady, capturing stable footage even in challenging water conditions.
Maintain Steady Breathing
Keeping your breathing steady is essential for camera stability in unsteady water conditions. When you control your breath, you minimize sudden movements that can shake the camera, making your footage clearer. Practicing calm, even breaths helps you stay relaxed and maintain better underwater communication with your team, ensuring everyone stays coordinated. Regular equipment maintenance is crucial; check your gear to prevent malfunctions that could cause disruptions or instability. Use a stabilizing rig or weight system to reduce drift, and avoid overexertion that can lead to erratic breathing. Staying mindful of your breathing not only improves shot stability but also conserves air, prolonging your dive time. Focus on slow, controlled inhalations and exhalations, and your camera will stay steadier even in challenging water conditions.
Combining Angles for a Complete Inspection
To get a complete view during underwater inspections, you need to combine footage taken from multiple angles. This approach guarantees you capture all relevant details, especially when observing marine wildlife and underwater plant life. By filming from different perspectives—above, below, and lateral—you can spot issues that might be hidden from a single angle. Combining these shots allows for a thorough assessment of potential damage or deterioration, revealing hidden cracks, corrosion, or growths that could compromise structural integrity. Remember, varied angles also help document the environment’s complexity, making it easier to identify patterns or recurring problems. When editing, align the footage carefully to create a comprehensive visual narrative, giving you a clearer understanding of the underwater scene and the true extent of any trouble spots.
Common Mistakes When Filming Underwater Trouble Spots

One common mistake is ignoring how lighting affects your footage, leading to unclear or dull images. You also might overlook the importance of camera stability, resulting in shaky and unprofessional shots. Paying attention to these details can make a big difference in capturing clear, steady footage.
Ignoring Lighting Effects
Ignoring lighting effects is a common mistake that can ruin an underwater shot. Without proper attention to lighting, your footage may appear dull, washed out, or overly shadowed. This makes it difficult to capture the true colors of the scene and hampers effective color correction in post-production. Bright, even lighting helps bring out vibrant details and enhances depth, making your footage more engaging. Be mindful of how natural light interacts with water and adjust your positioning accordingly. Using artificial lights or strobes can fill in shadows and improve color accuracy. Remember, neglecting lighting effects limits your ability to accurately represent the underwater environment, reducing the overall quality and impact of your footage. Proper lighting is essential for revealing the scene’s true essence.
Overlooking Camera Stability
Even with perfect lighting, shaky or unstable footage can ruin the impact of your underwater shots. Camera movement can make your footage hard to follow and diminish underwater focus. To prevent this, stabilize your camera using a steady hand or a stabilizer gear. Avoid sudden movements that cause jittering, which distracts viewers from the subject. Keep your movements smooth and controlled for clearer shots. Use the table below to understand common mistakes and solutions:
| Mistake | Solution |
|---|---|
| Jerky camera movement | Use stabilizers or tripod mounts |
| Overly quick pans | Move slowly and smoothly |
| Ignoring underwater focus | Regularly check and adjust focus |
How Underwater Angles Speed Up Repairs and Troubleshooting
Underwater angles play a crucial role in speeding up repairs and troubleshooting by providing clear, direct views of problems that are otherwise hard to see from the surface. Using an underwater drone allows you to get close-up angles that reveal issues like cracks or corrosion without guesswork. Incorporating sonar imaging enhances this process by offering detailed, real-time visuals of submerged structures, especially in murky water where visibility is limited. These angles enable you to pinpoint leaks, blockages, or damaged components quickly, reducing downtime. With precise underwater camera positioning, you avoid unnecessary disassembly and expedite repairs. Overall, leveraging the right angles with advanced tools like underwater drones and sonar imaging ensures faster, more accurate troubleshooting, saving time and resources.
Frequently Asked Questions
How Do Underwater Currents Affect Camera Angle Choices?
Underwater currents influence your camera angle choices because they can sway your shot and make it difficult to maintain stability. To adapt, you might choose angles that minimize current effects, such as shooting closer to the seabed or using stabilizing equipment. In marine ecosystems, understanding currents helps you plan better underwater navigation, ensuring you capture clear, steady footage while revealing the true conditions of the environment.
What Camera Equipment Is Best for Extreme Depth Inspections?
For extreme depth inspections, you need a sturdy waterproof housing that withstands high pressure and keeps your camera safe. Pair this with powerful underwater lighting to guarantee clear visuals in low-light conditions. Select a camera with high resolution and good low-light performance, like a DSLR or mirrorless camera with a robust housing. This setup allows you to capture detailed footage, revealing the true problem areas beneath the surface.
How to Prevent Equipment Fogging During Underwater Filming?
Did you know fogging can reduce camera clarity by up to 50%? To prevent equipment fogging during underwater filming, you should use proper lighting techniques to reduce temperature differences and apply anti-fog solutions before dives. Regular equipment maintenance, including cleaning and checking seals, is essential. Keeping your gear dry and storing it in a controlled environment also helps, ensuring clear shots and protecting your investment underwater.
Can Drone-Based Underwater Cameras Improve Angle Accuracy?
Yes, drone-based underwater cameras can improve angle accuracy, especially when capturing marine life and adjusting for underwater lighting conditions. You get a versatile, stable platform that can navigate tricky angles, revealing the true nature of your subject. With better positioning, you’ll record clearer images and more precise shots, making your footage more engaging. Just make certain the drone’s camera is equipped with appropriate lighting to combat low visibility and enhance details.
What Training Is Needed for Operators to Master Unique Angles?
You need specialized training to master unique underwater angles, focusing on underwater lighting and buoyancy control. Practice adjusting lighting to highlight specific areas without disturbing the environment, and refine buoyancy skills to achieve steady, precise movements. You should also learn camera positioning techniques to capture angles that reveal the real problem effectively. Continuous hands-on experience, combined with expert guidance, helps you develop the skills necessary for capturing accurate, impactful footage from challenging perspectives.
Conclusion
By mastering these underwater angles, you’ll unveil hidden cracks and unseen damage, turning murky waters into clear stories of the structure’s true condition. Imagine the thrill of catching that microcrack before it worsens or revealing the full scope of damage with a perfect wide shot. Your camera becomes a flashlight in the depths, guiding repairs with precision. With every angle, you bring clarity and confidence, transforming intimidating inspections into empowering discoveries beneath the surface.